

I've got a new Digital Scrapbook tutorial for you today. You can find the others here. Its a quick and fun one using Canva. I've used Canva to create printables and images for my blog but I wanted to see how easy it would be to create a scrapbook layout. With the templates its really quick and easy.
When you go to canva click on create a design. Then in the top right corner click on custom dimensions. For this one we are making a 12"x 12" layout. Once you click on the button your screen will look like this. Type in your dimensions and make sure to change it to inches. Click on Design.

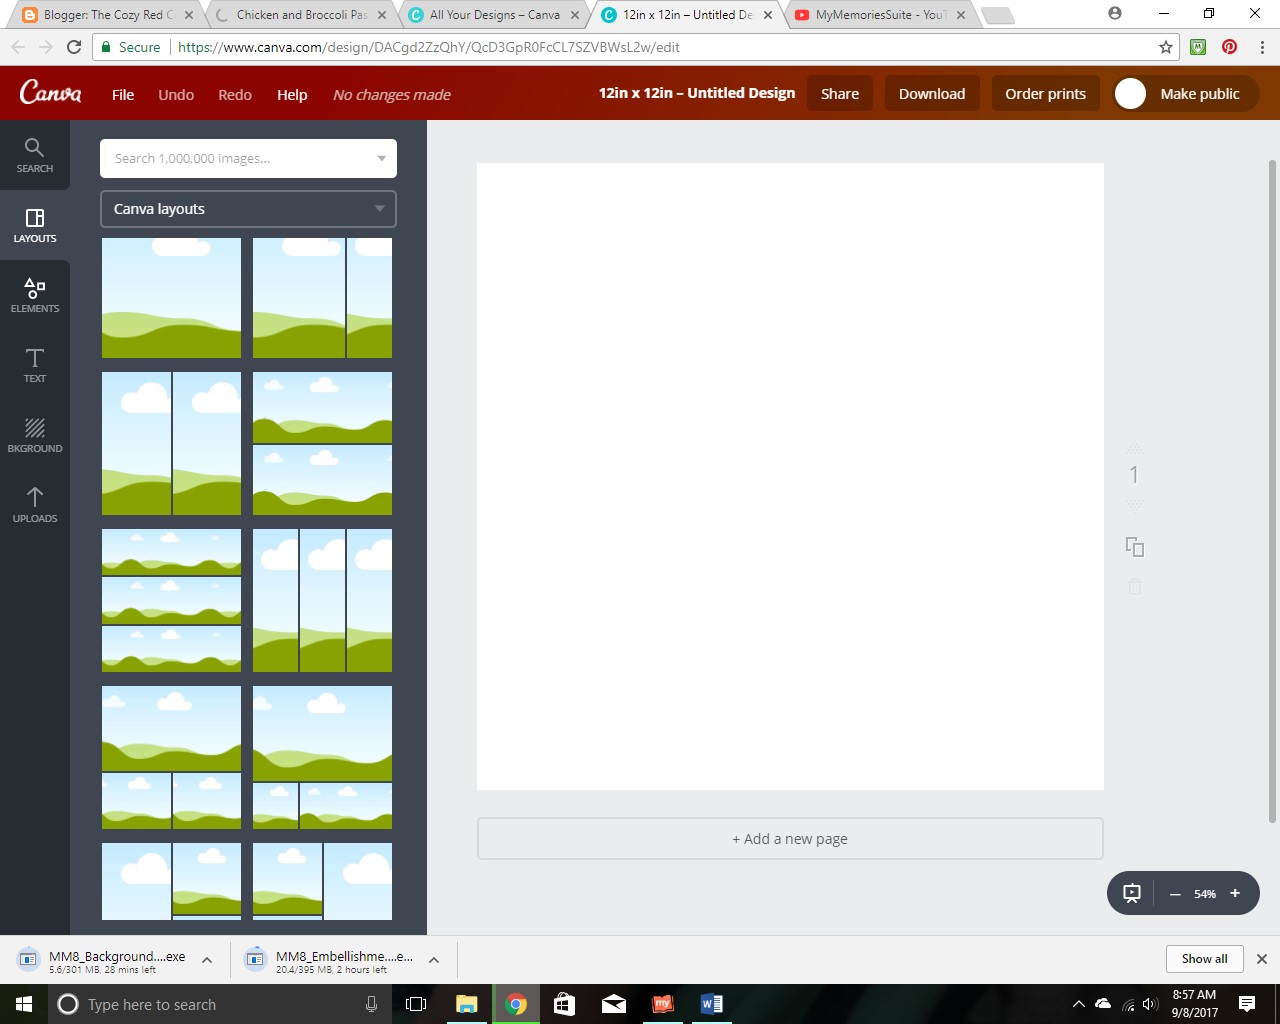
This is the next screen you will see. Pick a layout that will work best with your pictures you want to use. Click on it and drag it over to your "canvas"
Next click on upload (left side at the bottom). Click on upload your images and pick the photos you want to include.

After I decided on the pictures I wanted to use I realized they didn't really work with my original layout. No big deal I went back to layout and switched it to one that worked a little better. Then I went back to uploads and dragged my pictures to the spot I wanted them. Once you place you can move your picture around or crop to get the fit you want double click on it to bring up the screen. There are also options to add filters.

Next up is adding text. I LOVE the fonts and text design options Canva provides. I used the first design (the one that says Ice Cream Party). Moved it in place and changed the large words to Raspberry Jam. I didn't need the top and bottom text so I deleted it. Super easy.

You can click on it and change the font, the size, and color. I used the same one to add the date as well.


You can see the lines I added on the 2 individual pictures. I wanted to add some of my own embellishments from my computer so I went back to uploads and picked a few. I went with the flowers and was able to size and put in place. These were png. files with transparent backgrounds. I thought they were a lot easier to place then jpeg. images just because it didn't want to fill my picture box with my embellishment. It still works with both the placement was just a little easier with the png. (For your main pictures jpeg. is perfect)

Once you are happy with your layout head to download and save to your computer.

Here's my finished layout. From start to finish it took about 5 minutes. The hardest part was deciding on pictures and embellishments. I'm excited to explore and create some more in Canva.

Thank you! This was helpful.
ReplyDeleteThank you! This was helpful.
ReplyDeleteThank you! This was helpful.
ReplyDelete