Showing posts with label wood signs. Show all posts

Friday, January 31, 2020

Weekend Roundup: Favorite Finds #8


Yeah I'm so excited its the weekend.  We've been hit with sick kids, tax season, and just plain busyness.  I'm excited to slow down a little for a day or two.  Today I have fun finds to share with you.  People are so talented and I love that they share that talent with us! Let's jump right in. 

*This post may contain affiliate links.  This means when you purchase an item though one one of my links I earn a small commission at no extra cost to you.  This helps me run my blog and create fun content for you.  Also I never share any products that I do not love and would buy myself or already own.

First up I have a couple of ADORABLE playhouses.  I really want to build one this year and here are a few I  love.  The first one is so cute.  Those shutters and pink door are perfect.  You can find the details here.

This one is so perfect!  found on Instagram here. (Oh and I just started following her...so much goodness!)

I love these plans found here

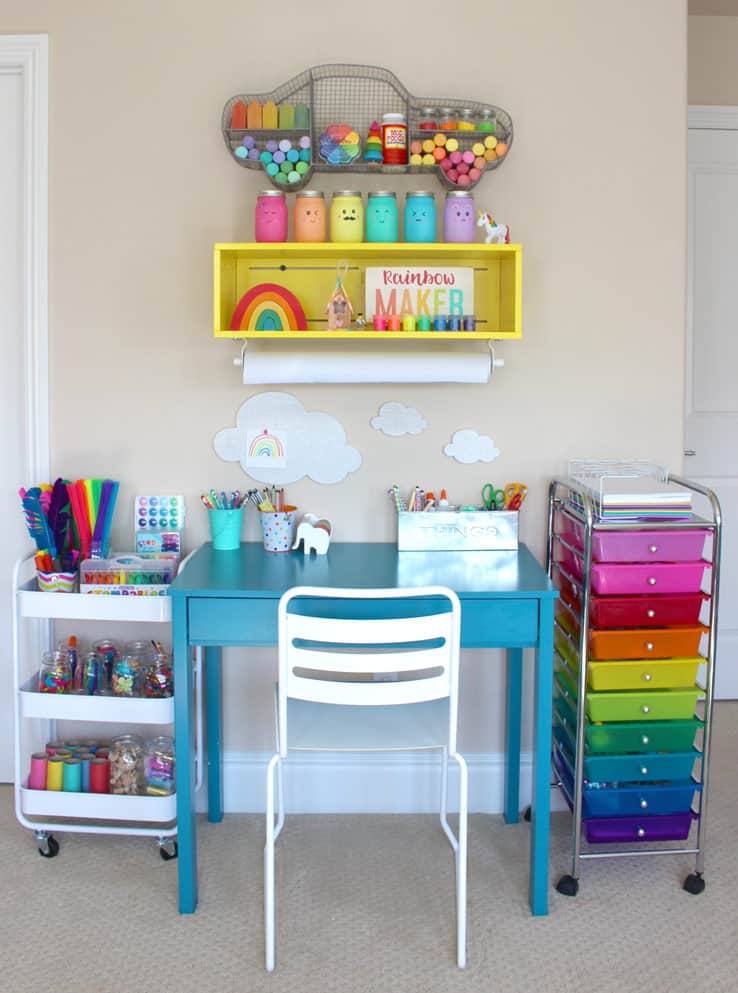
I love this happy art area.  I need to revamp mine and love the inspiration found here


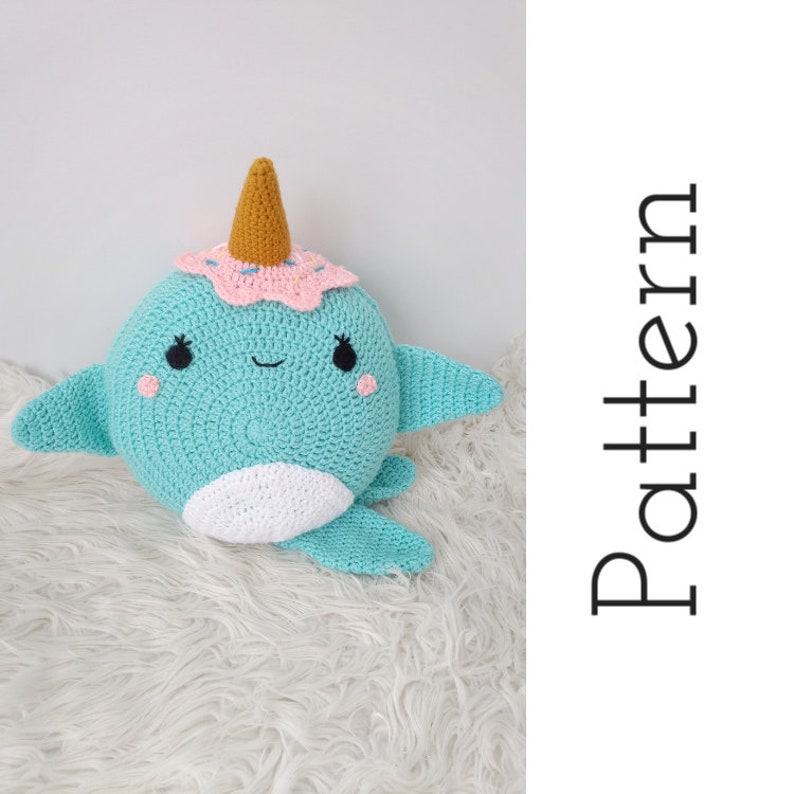
How cute is this adorable narwhal?!?  It looks like a fun and easy pattern found here

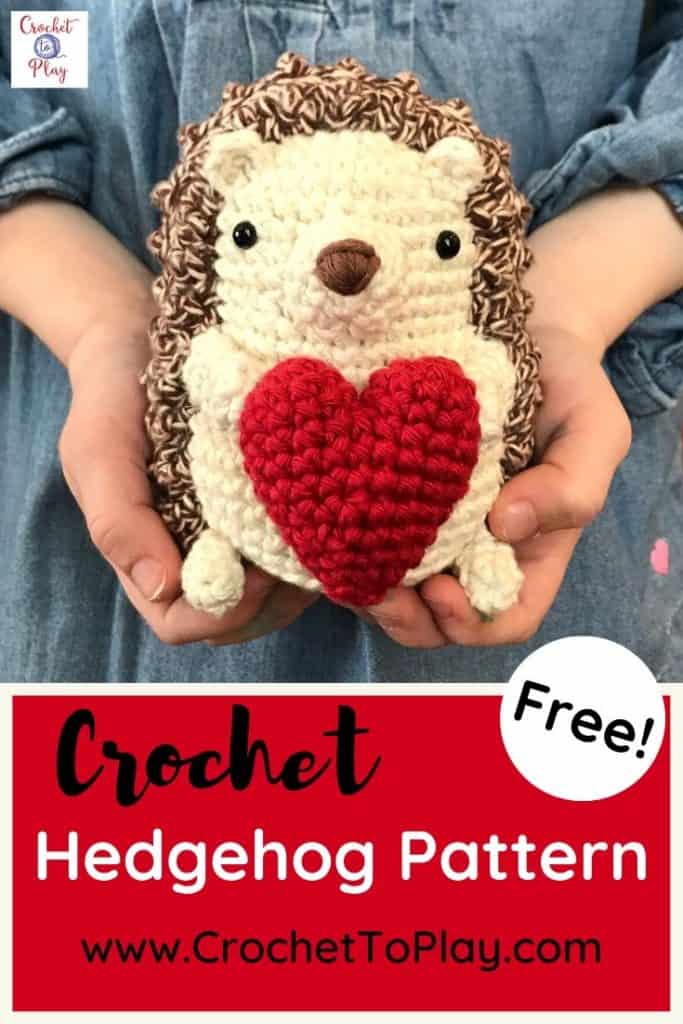
Another adorable pattern!  This would make a super cute Valentine's Day gift.  Find the free pattern here

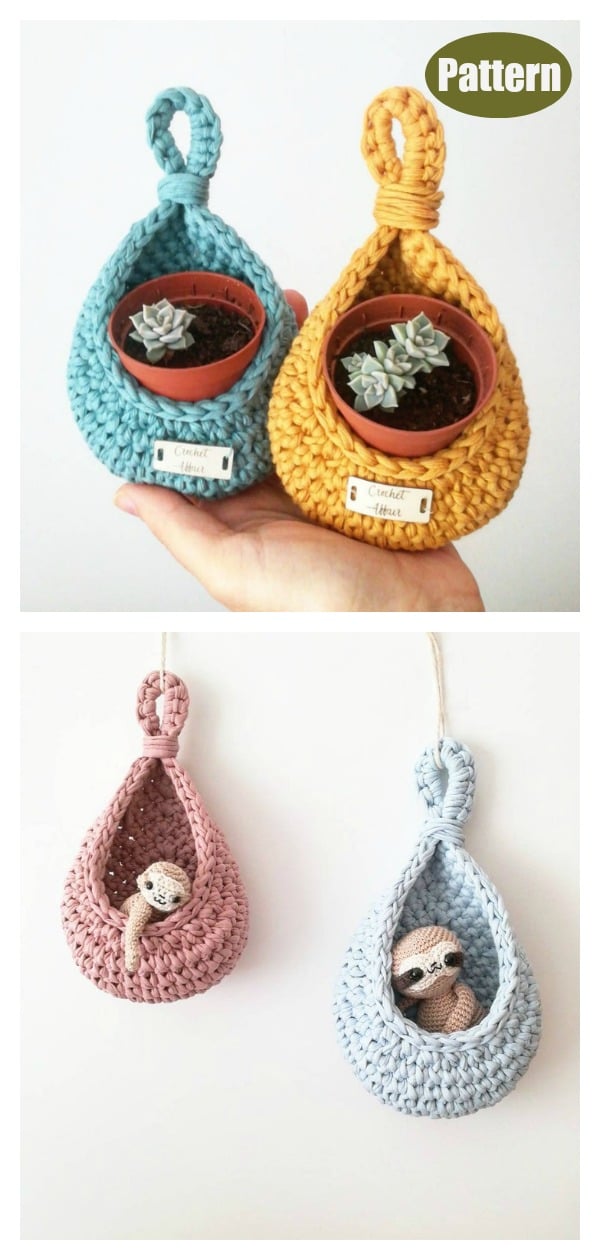
I thought these baskets were just too cute not to share.  I'm not sure if I love the plants or little animals inside better.  find it here
I must really be in a crocheting mood this week because here is another awesome pattern.  I've had my eye on this one for a while and she is now offering it for free!  Find it here
I love everything about this sign.  It's now on my to make list.  You can find the tutorial  here


Another gorgeous wreath!  So pretty for spring or a little girls room.  Find the tutorial here


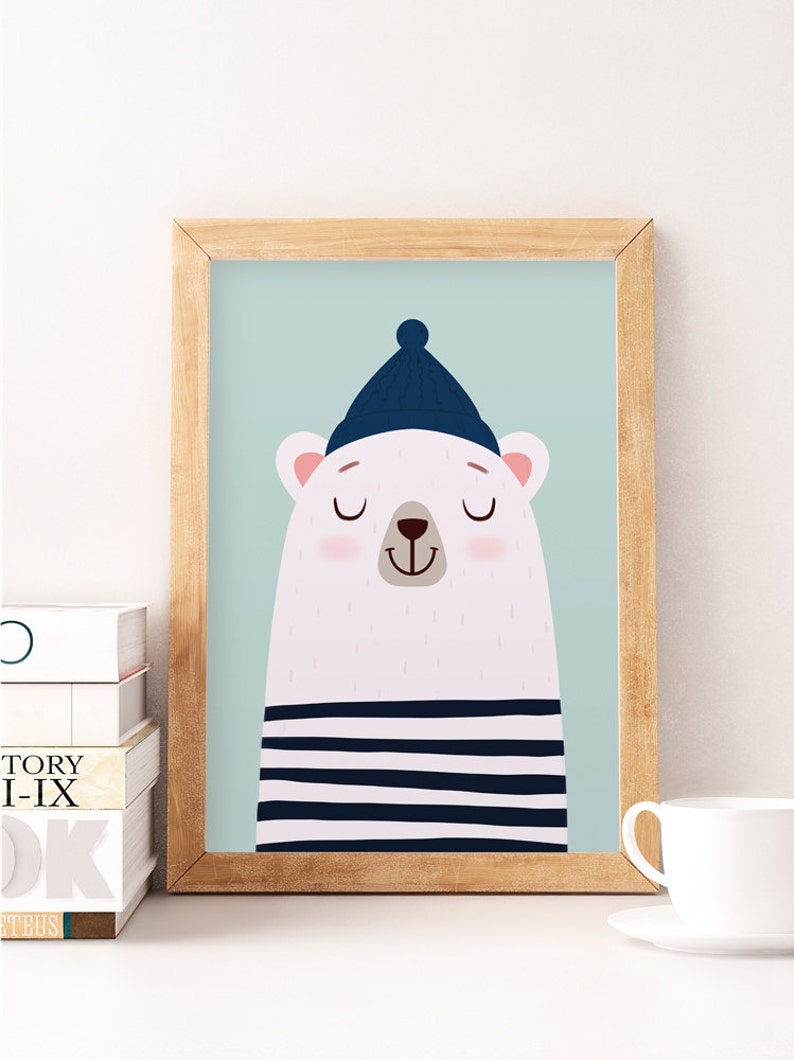
I just super love this print :)  Find it here

Here's a little groundhog day celebration idea.  These cookies are so fun!  Find them here

Your kids will go crazy for these Groundhog cookies.  The groundhog even pops up and down!  Find them here


It's a little early for spring but these are so cute! Find them here


That's all for this week! I'd love to see what inspires you.  Do you have an Etsy Shop, Instagram, or Blog?  I'd love to feature you.  Send me a message :)


Wednesday, August 8, 2018

How to Give an Old Frame an Updated Farmhouse Look

This post contains affiliate links. That means if you use my link, I make a small commission at no extra cost to you. As always, thank you for your support.

Have you ever walked by the clearance aisle or been at a yard sale and bought something because it was only $1 or so?  That's what this frame was for me...clearance at Hobby Lobby impulse buy.  


From a distance I kind of liked it  (this was about 7 or 8 years ago).  It was big, I love red, and the scrolly lettering looked kind of cool so I grabbed it and didn't even think to read it until I got home.  That's when I fell out of love with it.  We used it for a while but eventually it was shoved in a closet where all of the other items I have bought go until I get around to fixing them.  We're talking years!

Last month inspiration finally hit and I am in LOVE with this frame now!  It now has more of a modern farmhouse look that I love.  It's amazing what some paint, wood, and stain can do.  It doesn't hurt that these are some of my favorite pictures :)

Those pictures are from the night we got engaged.  We look so little!  

You probably don't have the same frame I have but this will work with any frame (canvas, sign, etc.) with a straight edge.  Check your stash of frames or turn some of those unfinished frames you find at the craft store into a showstopper!

Here's how to do it.

Optional step:  If you have any type of design or lettering on your frame gently sand it down to avoid seeing it through your new, beautiful paint job.  Or if its not wood but plastic (I think its plastic..I don't know what it is) gently sand where you are going to paint.  It will give your paint something to grip. My frame is not wood so I can tell you paint will work.

Next Paint!  I recommend chalk paint.  It works on pretty much any surface.  I tried acrylic at first and eventually gave up.  I used this brand in white Adirondack.  It works great, its inexpensive, and last bottle of paint seems to last forever!  Also I use these brushes.  It makes a huge difference in quality and I think speed then using a regular or foam brush.  It took about 3 coats.


Now its time to build your frame.

The edge of my frame was about the same width as my wood so it sits flush if your frame is smaller you will have more of a traditional framed farmhouse sign.  However, if you like the flushed look (and your frame is thinner then your wood) lay your frame face down instead of face up when attaching your wood.  Let me know if you need me to clarify this a little more :)

I use cheap 1x2 furring strips for my frames.  They are around $1 each.  Measure the bottom of your frame and the top of your frame and cut your boards to match. Move into place for the next measurement.
For the sides you are going to measure from the top corner of your "frame" at the top to the bottom of your "frame" at the bottom.  Cut your wood.  Here's a close up of the corners.

Here's a better visual from another project I made. There are some more detailed instructions in that post as well. (find it here).

Here's what your frame should look like.  Now that its all cut to size paint or stain your wood.  (I love this stain).  For this project I used ebony.

Once your stain is dry its time to attach your frame.  Move your wood into place and glue together with wood glue (this stuff works great).  That's all I used but you can add a few nails with a nail gun.  I'm not putting any weight on the actual wood frame so just the glue has worked for me.


Friday, June 1, 2018

Reversible Farmhouse Signs


I love big, beautiful holiday signs but what I don't love is finding a way to store them. After I made this fun sign (find the tutorial here) this past fall I loved the location of the sign and knew I wanted to make another sign to fill the spot.


Then it clicked why not just paint the back.  So that's just what I did.  I had already stained all of the sides of the frame when I put it together so I covered them with some painters tape and made a new sign


I painted the board black.  Once it was dry I placed my vinyl and painted the entire board white.  After it dried I carefully pulled the vinyl off and lightly sanded to give it a distressed look.

The farmhouse side sits flush with the frame and the harvest side sits back inside the frame.

I now have two amazing signs for the cost of one and I saved time and I don't have to worry about storing either one!


Tuesday, February 13, 2018

Crocheted Arrow Farmhouse Sign


This might be one of my favorite projects.  It combines my love of crochet with my love for home decor (especially framed signs!)
I actually made this a year ago and use it in my girls room but love to bring it into the living room for Valentine's day.  I used this pattern to create the arrow (it's a paid pattern).  If arrows aren't really your thing or you are looking for a free pattern the possibilities with this idea are endless.  The only thing is you probably want something that lays somewhat flat.  I love the ideas of flowers, animals, these feathers, or even simple hearts. 


To make this sign I first crocheted my arrow.  Then cut a board to fit the size I needed.  To get the look of this board I stained it.  Once it was dry I painted it gray then heavily distressed the entire board so the colors sort of blended together.  Cut, stained, and attached the frame (quick tutorial can be found in this post or this one).  Then used hot glue to attach the arrow to the center.

I love the texture the yarn adds that paint just can't do.  Of course you could always add some vinyl or painted letters it would be so cute!


Here are a couple more colors.  These ones are in my little boys room.


Tuesday, February 6, 2018

Reversible Valentine's and St. Patrick's day Blocks


I have a quick project for you and lets just call it the lazy way to get an awesome distressed look with half the work.  
You can do this with any sign but I thought it would be fun to use some 4x4 blocks I had laying around and turn them into reversible Valentine's and St. Patty's day decor.  I love when I have something that is quick to change for the season and even better less to store.

Sand and paint your blocks.  
 I used chalk paint but any kind will work.
 Size and cut your vinyl.  Apply to your blocks.
Front
 Back
 Paint a thin coat of the same color of paint directly over your vinyl.
 Let it dry
 Using a piece of sandpaper gently sand the paint off your vinyl.  It will give your vinyl a matte look and leave some paint making it look hand painted and distressed instead of vinyl.
 You can sand some of your block too for a great overall distressed look.  
You can also lightly rub some dark wax along the edges and a few spots on your wood.  I used the edge of a paper towel to apply it.  Once it drys sand to give it a more even look.

 I tied some tulle around the blocks to give it a little more color and just switched the color out for each holiday.