Monday, September 11, 2017

Chicka Chicka Boom Boom Preschool Theme

I'm so excited to share our first preschool post of the new school year.  We are going to be doing a letter a week and once we finish up I'll share all of our fun activities in one giant post.  If I get a little antsy I might share a few fun downloads a little early.   We joined a little mommy and me group so on my weeks expect a ton of activities and ideas.  On our off weeks we will still be doing our own preschool at home but on a much smaller scale.  Also sometimes my older girls and little guy like to join in so there may be a few grade school and tot school activities or modifications thrown in.  

Now that all of that info is out of the way our first theme was based on the book Chicka Chicka Boom Boom.  I went with a general introduction of the alphabet with an emphasis on the letter in her name.
To start the week we read the book, pointed out letters, and sung our abcs.

I found this fun Board Game here.  Its editable!  I used the letters from her name and we identified upper and lowercase.  It was played over and over.  Also a good way to practice numbers and counting with the dice. 
Coconut Tree Number Mat (Find our post & download here)  This was a favorite.  We used tongs (great for fine motor skills) but you don't have to.

Introduced our Coconut Tree on our Preschool Board (found here)

Hand print Palm Tree.  There is nothing more exciting to a 3 year old then getting to paint her hand.  

Paint hand and wrist

Then stamp on the paper.  Paint and stamp hand a few more times to create the branches.


Dip finger in brown paint and and use fingerprint fro coconuts.  Decorate with Alphabet stickers.  They chose to stick them on the bottom but anywhere on the tree would be cute.


Alphabet puzzle.  I bought this alphabet puzzle a while ago at the dollar store. I love that it helps her learn to recognize the letters and the order but its pretty overwhelming. There are too many pieces (obviously 26) and difficult shapes. To make it a little easier and so she can be a little more independent I wrote the letters on the board. This will give her some help while she is still learning how to put a puzzle together and the Alphabet. I will eventually change the letters to lowercase to give her some additional practice and eventually erase it all together. Right now this is working for us.

Letter Hunt and Dot Page (dot page found here almost at the bottom of the post & Letters are included in the mini download at the end of post).  I hid about half of the letters and sent her on a number hunt. We did the other half the next day.
She the found her letters on her dot page and stamped them with her dot markers.

Letter Sensory bins using puzzle pieces.  If you don't have a puzzle you can use the letters from the activity above.

Even this guy had fun scooping and dumping.

Mystery Letters (idea from here).  This was such a fun activity and so quick to put together.  I wrote the letters in her name on a white piece of paper with a white crayon.  She used some water colors to uncover the mystery letters.

I love her face when she discovered a new letter.

Color Match Game-(Download in mini pack below) Print two on Cardstock


We played ring a round the rosie but substituted the words.  We would sing part of the ABC's then yell chicka chicka boom boom.  On the last boom we would fall down.  (we did A-G, H-P, Q-Z)  It was a big hit.
Practice Rhythmn-  slap (hit knees), slap, clap, clap or slap, clap, slap, clap.  increase and decrees speed.  We said chicka chicka boom boom over and over.  

We watched this YouTube video found here.


Additional ideas I found and love but didn't get to
Stem idea found here


Number Bingo found here

So many cute ideas on this site.  This is my new go to for ideas. 


Friday, September 8, 2017

Quick and Beautiful Scrapbook Pages with Canva


I've got a new Digital Scrapbook tutorial for you today.  You can find the others here.  Its a quick and fun one using Canva.  I've used Canva to create printables and images for my blog but I wanted to see how easy it would be to create a scrapbook layout.  With the templates its really quick and easy.  
When you go to canva click on create a design.  Then in the top right corner click on custom dimensions.  For this one we are making a 12"x 12" layout.  Once you click on the button your screen will look like this.  Type in your dimensions and make sure to change it to inches.  Click on Design.


This is the next screen you will see.  Pick a layout that will work best with your pictures you want to use.  Click on it and drag it over to your "canvas"


Next click on upload (left side at the bottom).  Click on upload your images and pick the photos you want to include.


After I decided on the pictures I wanted to use I realized they didn't really work with my original layout.  No big deal I went back to layout and switched it to one that worked a little better.  Then I went back to uploads and dragged my pictures to the spot I wanted them.  Once you place you can move your picture around or crop to get the fit you want double click on it to bring up the screen.  There are also options to add filters.

Next up is adding text.  I LOVE the fonts and text design options Canva provides.  I used the first design (the one that says Ice Cream Party).  Moved it in place and changed the large words to Raspberry Jam.  I didn't need the top and bottom text so I deleted it.  Super easy.  
 You can click on it and change the font, the size, and color.  I used the same one to add the date as well.
 Another fun option they provide is elements.  You might find some fun embellishment for your project.  I really like the lines.  There are so many fun designs and you can change the color to fit your project.  I forgot the picture for this one but I added one to two of the pictures.  To make it easy I added and sized it to the first and then clicked copy at the top.  I just had to move it in place for the second.

You can see the lines I added on the 2 individual pictures.  I wanted to add some of my own embellishments from my computer so I went back to uploads and picked a few.  I went with the flowers and was able to size and put in place.  These were png. files with transparent backgrounds.  I thought they were a lot easier to place then jpeg.  images just because it didn't want to fill my picture box with my embellishment.  It still works with both the placement was just a little easier with the png.  (For your main pictures jpeg. is perfect)

Once you are happy with your layout head to download and save to your computer.

Here's my finished layout.  From start to finish it took about 5 minutes.  The hardest part was deciding on pictures and embellishments.  I'm excited to explore and create some more in Canva

Thursday, September 7, 2017

Teaching the Number 1

I really think it is difficult to teach numbers individually it just seems more natural for me to teach 1-5 or up to 10.  My little preschool group decided that we should teach each number individually and I do think there are some benefits to doing it this way.  For example most of them can count to 20 but they don't recognize the numbers when they see them.  This week I taught the number 1.  Here are a few ideas.

The number poster I created for our preschool board.  It was visible all week.


Download number poster here

We wrote the number 1 in the air, on the white board and used the following tracer page for extra practice.

Number Tracers worksheets from here


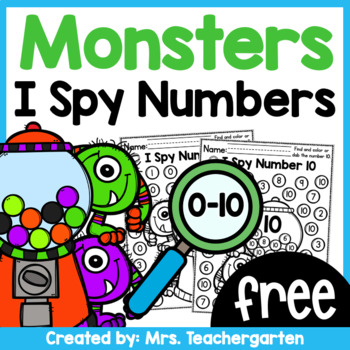
We used our Dot Marker for this fun I spy activity found here


We did the Hokey Pokey but changed it up by "putting one arm in" or  "1 leg in."   This was a big hit. 
Turn on some music and hit 1 balloon in the air.
Another idea I had but we didn't get to was to use this number one template and let the kids paint it with one finger

I'll be adding to the number poster download and sharing some more ideas to teach individual numbers as we go.  Also check out our preschool themes for more counting and math ideas.


Saturday, September 2, 2017

candy corn inspired pillow

I had a brilliant idea (or so I thought it was).  I was going to make a candy corn pillow.  After two tries it just wasn't pretty and not what I had envisioned BUT this fun pillow came to me instead.  So instead of an actually candy corn pillow I now have a pretty pillow inspired by candy corns...I love it so much more.
Want to make one?
Cut out 4 4"x4" squares from orange and yellow fabric.  I then Cut out 8 4"x4" squares from white.  Arrange in the pattern you want.
Start with your first row and pin your first two fabric right sides together and sew.  Add the next piece of fabric and continue until you have all 4 pieces sewn together.
It should look like this when your done.  Continue with each row.
Now you're going to pin your first and second row right sides together and sew. 
Continue until you have all four rows sewn together.  It should look like this.
For the back:
Cut out 1 15"x4" pieces from your yellow and orange fabric.  Pin the long sides right sides together and sew.
Cut your white fabric 15"x7.5".  Pin to your yellow and orange fabric piece with right sides together and sew.
You now have your front and back pieces done.
Pin them right sides together and sew around.  I curved the corners and make sure you leave an opening to pull through.
Clip the corners if you curved them and pull it through.  Stuff it and sew the opening closed with a needle and thread.
Now enjoy a little bit of fall with your candy corn "inspired" pillow.  My little one loves it and wouldn't let go when I wanted to take a picture.
The front
the back (may be my favorite)
and the best part is its even soft.