Saturday, February 4, 2017

V is for Valentine Free Preschool Learning Pack

Our Next Preschool theme is V is for Valentine.  I am doing things a little different this time.  I will normally post everything (learning packs, crafts, activities, songs, etc.) in one large post after we complete the unit.  That makes it easy to find it when you need it.  However we will be working on this theme through Valentine's day and didn't want you to miss out this year.  So today I'll be posting our learning pack that we will be using.  I just finished it yesterday and love it!  We've already tried a few out.  I will post all of our other activities and crafts as we go.

You will notice a lot of similarities between each learning pack in regards to the activities we do.  I like to reinforce these important skills and being familiar with the format seems to help.  Of course I like to mix it up sometimes as well.

V is For Valentine  


 I always like to introduce the letter and read Chicka Chicka Boom Boom.  Let them help you read it and make a big deal pointing out the "letter of the week."

I have three different downloads this week each have a few different activities. I'll let you know what is in each of them so you can choose what activities work best for you.  I really like to figure out multiple skills I can teach with every activity and printable we use so I'll be sharing those with you too
(There is no watermark on the download)


Learning Pack #1
Contains our cute "Letter Poster" for the week.  I hang it on the wall and we practice the letter sound and recognition.

It also has a coloring page, heart matching game, lacing card, and counting cards.
Page 1 & 2.  Coloring page and letter poster I print on regular paper.  

Page 3 Heart matching game Print 2 copies on cardstock.  You can also print a few more and work on patterns.
You can also use this for mini puzzles.  Print an extra and cut each heart different ways.

Page 4 Lacing activity print on cardstock and hole punch around the edge.  I included some white circles to give you a guide but you can add more or less.  Also you can laminate for durability. 


Page 5-7 gumball counting cards.  Print on regular paper or cardstock.  I like to cut them apart and use them for multiple activities.
Here's how we use the counting cards. (Its the same way we used our snowman cards).
Each gumball machine has a number on it so we put them in numerical order and practices number recognition.

Next we worked on one-to-one correspondence using candy hearts.  For example on the gumball machine with the number 3 we put 3 hearts on it.

For the last activity we work on colors.  Cover the numbers with different colored hearts (you will only need 4 or 5 cards for this activity).  Place a handful of candy on the table and sort by color.  This also works well with buttons.  Here's an example below with our snowman cards.


Learning Pack #2

Letter Recognition- I made a lowercase and uppercase page for this one.  Use one or both (page 3 & 4) page 1  has your letters (I recommend cardstock for this page).  Cut out the letters you need.  You can have them match lowercase to lowercase or lowercase to uppercase however you want to do it.  I save my letters from each week and only cut out the letters I don't have.  If you do this you will eventually have a full set and won't have so much to cut!


Sizing-Print page 2 and cut out.  put in order from biggest to smallest or smallest to biggest.

Snowman Hunt-(used our sizing hearts)  Hide the hearts around the room and let your little one find them.  You can also play hot and cold. We count them and put them in order from biggest to smallest each time.
Download Learning Pack 2 here


Learning pack #3
Is our Letter Book.  I'm so excited to add these each week.  My daughter loves her book!  Cut along the black line and staple all of your pages together.


Download your Letter V book here

Credits:  I used clip art and graphic by: For his GloryMelonheadz, and clipart kid


Additional Items from other great bloggers we are using
Shape File folder Game from Itsy Bitsy Fun

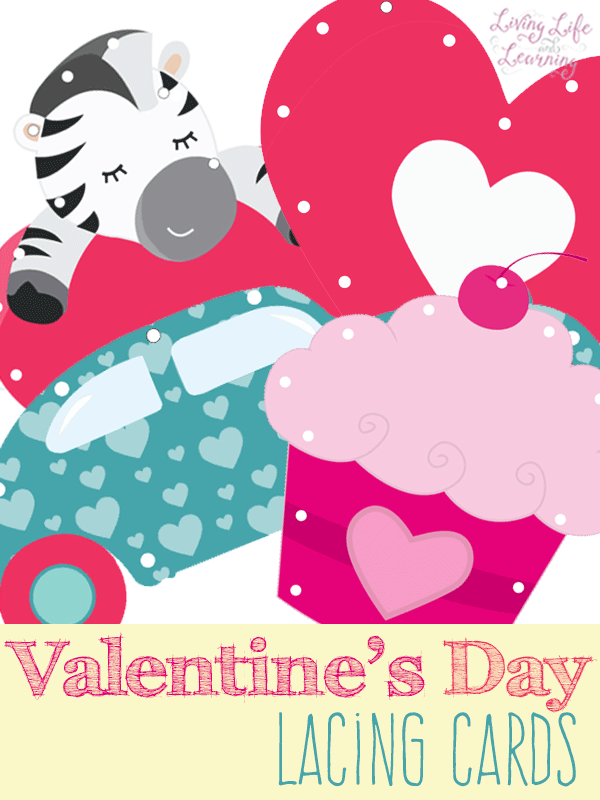
Extra lacing cards.  From Living Life and Learning.  I printed out the zebra and the cupcake


Watch for our other Valentine Crafts and Activities!

Past Themes


Thursday, February 2, 2017

February Visiting Teaching Handout

This months Message really touched my heart.  I am so grateful to know that we have a Heavenly Father that loves us.  (you can find the full message here).


You can save to your computer and print at your favorite place (size to fit a 4x6).  You can also copy and paste to a word document and shrink to the size you want.  This is my favorite way and I like to fit 4 to a page.  Please let me know if you have any questions.

8 Free Valentine's Day Prints & Cute Clip Display

I went a little crazy this week and made 8, YES 8, Valentine's Day Printables that I'm sharing with you today. Hopefully you find one you love! 


So Cute Right!!!  They are all at the end of this post but first did you notice my cute little photo holder?  I made it a few years ago and yesterday it got a little makeover.  Its amazing what paint can do.


Here's the before.   I used this tutorial from Shanty To Chic  to make them.  They are really easy and inexpensive.  The one I used for this project is the small one in front and measures 7" tall by 8" wide.  I still need to paint the larger ones.

 If you like the distressed look this is an easy way to get it.  I painted right over the black and lightly sanded the areas I wanted the black to show through. They were cute but I love how the white shows the detail so much more. A little close up.


Now for the printables!  You can print at home OR save and print using your favorite place to print pictures.  These are sized to fit a a 5x7 frame.  Click on the picture and  Copy and paste to a word document or right click and save to your computer and upload to your favorite site.


Wednesday, February 1, 2017

S is for snowman


Here's our first preschool theme post on this blog.  I'm so excited about this.  I hope to share these weekly with you.  To make things easier on myself I like to pick a letter and a theme for the week.  These posts will include our letter craft, printables I used/make, any crafts, songs, and activities we do that fit in with the theme.  (We sometime do additional activities or crafts just for fun but those will be posted separately.)  I did this with my older kids when they were young and they loved it and I look forward to adding preschool to our routine with my 2 little ones.  So you will probably get a mixture of new activities and occasionally some posts from our old preschool blog.  Hopefully you find some fun activities for you and your little one.


 I always like to introduce the letter and read Chicka Chicka Boom Boom.  Let them help you read it and make a big deal pointing out the "letter of the week."


S is for snowman craft.   

You can always let them get creative.  This one looks like is ready for a beach.  I know I am.


I used this cute snowman printable found here.  
I really like to figure out multiple skills I can teach with every activity we do.  So With this one printable we did three different things.
Each snowman has a number on his hat so we put them in numerical order and practices number recognition.
Next we worked on one-to-one correspondence using buttons.  For example on the snowman with the number 3 we put 3 buttons on him.
For the last activity we worked on colors.  I covered some of the numbers with different colored buttons.  I gave her a handful of buttons and she matched the color to the correct snowman.  We stuck with basic colors but this is a great activity because there are so many different shades.  It really makes them think.

Story Time and Craft


We read this cute book and made an itsy bitsy sock snowman

We found the idea and instructions here.  


We changed the supplies list a little but you can find detailed instructions on her site.

Here are a few things we changed.
1. We used white kids socks and colored toddler socks for the hats.  
2. We did not use rice to fill the bodies.  Instead we filled the bottom of our socks about 1/4 way up with dried beans (so he would stand) and the rest with stuffing.  We finished at the ribbed part of the sock.
3. We did not have mini pom poms so we used an orange pipe cleaner for the nose. 
4. For the face we used a black sharpie.  It seemed much easier then paint for my 3 year old. As you can see she got a little creative with her snowman.


And this one has temporary hair.  I love letting my kids make it their own.  

I put together a Match game, letter match, and puzzles, and sizing games.  I just used free clipart to make them.  You can Download a copy here.  The larger snowmen on the sizing activity are not as crisp as I had hoped but it still works :)  Here they are in action.

Snowman Matching Game (print 2 of page 1 on cardstock)
Mini Puzzles (print page 1 one cardstock) Cut out and cut in half.
Letter Recognition- I made a lowercase and uppercase page for this one.  Use one or both (page 4 & 5) page 2 (I recommend cardstock for this page) has your letters.  Cut out the letters you need.  You can have them match lowercase to lowercase or lowercase to uppercase however you want to do it.

I didn't get any pictures of the next two activities

Sizing-Print page 3 and cut out.  put in order from biggest to smallest or smallest to biggest.

Snowman Hunt-(used our sizing snowman)  Hide the snowmen around the room and let your little one find them.  You can also play hot and cold. We would count them and put them in order from biggest to smallest each time.

Additional activities that would be fun from our blog.


clip art used found here.

Here are some of the books we read. (These are affiliate links-we own and love all of these books)

Monday, January 30, 2017

How to take your Printables to the next level

Its no secret I LOVE printables!  I use them all over my house and especially love to switch them out for the holidays.  They are a quick, easy, and inexpensive way to switch up your decor.  I love adding them to cute frames or clipboards but today I'm going to show you an easy way to to turn them into a piece of art for your home.  Oh and the best thing is it can be temporary or permanent!

How cute are these!  
 You just need wood, stain or paint, your favorite printable, and a glue stick.

My printables were cut down to an  8"x10" and printed on cardstock.  I used a 12"x8"x1" board.  The Length doesn't matter (the 8").  The 12 inches wide is the important part oh and guess what they are not actually 12 inches!  Mine is about 11 1/4 inches.   I cut my boards every 9 inches so my final measurement is 11 1/4 x 9 inches.  This will give you about a 1/2 inch edge all around.
Next I stained the sides and around the edges.  I used Jacobean by minwax.  Its my favorite color.
Then I used a glue stick (just a regular glue stick) and stuck it on my board.  It will hold up well for quite a while.  I've had mine for several months and I'm just now reglueing some of the edges that came loose.  This is perfect for seasonal decor or if you don't want anything permanent.  You can also use a spray adhesive and it will be more permanent.